Making a procedurally generated medieval city in Blender 3.1 with Geometry Nodes (part 2)
In the previous post, I described two approaches to building the medieval city, which consisted in extruding floor plans. It worked but was quite restrictive in what kind of houses we could produce. In this post, I'll describe the third approach, which consists in building a few building instances (templates), then laying them out. I'll also cover polishes.
Building houses
Fancy windows and doors
In the previous post, I had carved out windows and doors by generating cubes along the walls, then subtracting them from the wall mesh. But in real life, windows have a wooden frame and glass pane. Doors too are made of wood and in my reference pictures, they have a stone arch around them.
In order accomodate any window or door design, I modified my geometry node to use the Convex Hulls of the windows instead of cubes. This way it carves out the exact shape of the window. Finally I add a window in each hole.
I also refined the node to avoid generating doors and windows on corners.
Brick walls
To make bricks, I could have used the Bricks Texture. But I noticed it didn't work in certain directions. So instead I used a Voronoi Texture. It has the added benefit of not being perfectly symmetrical. Imperfections are good, they make the bricks more realistic. I also mixed in some Musgrave Texture to make the bricks more bumpy.
Floor plans
It was great to be able to reuse nearly all of my work from the previous post. I reused the "solidified wall" approach to help me build a house with only two inputs:
- the mesh that describes the floor plan.
- the number of floors to generate.
And with that, I was able to make a few building types in just a few minutes. Some of which were the assembly of several "buildings".
Placing houses
Position
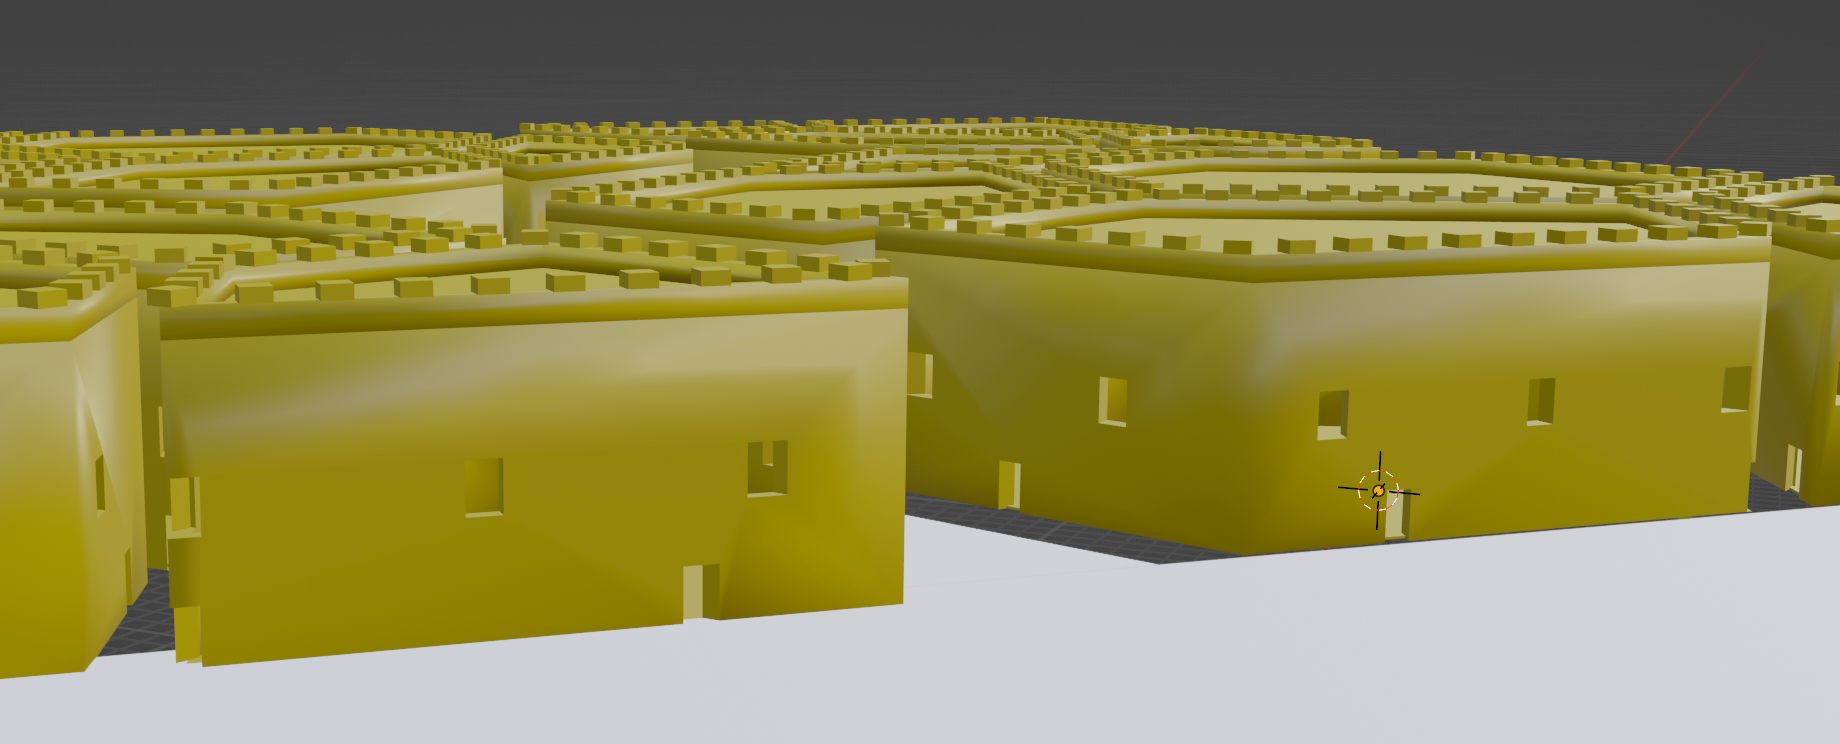
I want to randomly place buildings in "residential blocks". I also want to avoid buildings from overlapping one another. To do that, I used the Distribute Points on Faces node with the Poisson Disk method. This method allows me to set a minimum distance between points. The Bounding Box node gives me the bounding box of the union of my houses. If I feed the Distance between the min and max points, I can ensure that no house intersects another. However, I've found that by being too safe, the houses are too sparsed. So I scale down the minimum distance between points by 30%. With this value, the residential blocks are much more dense. Some buildings intersect, but it's barely noticeable in the final video.

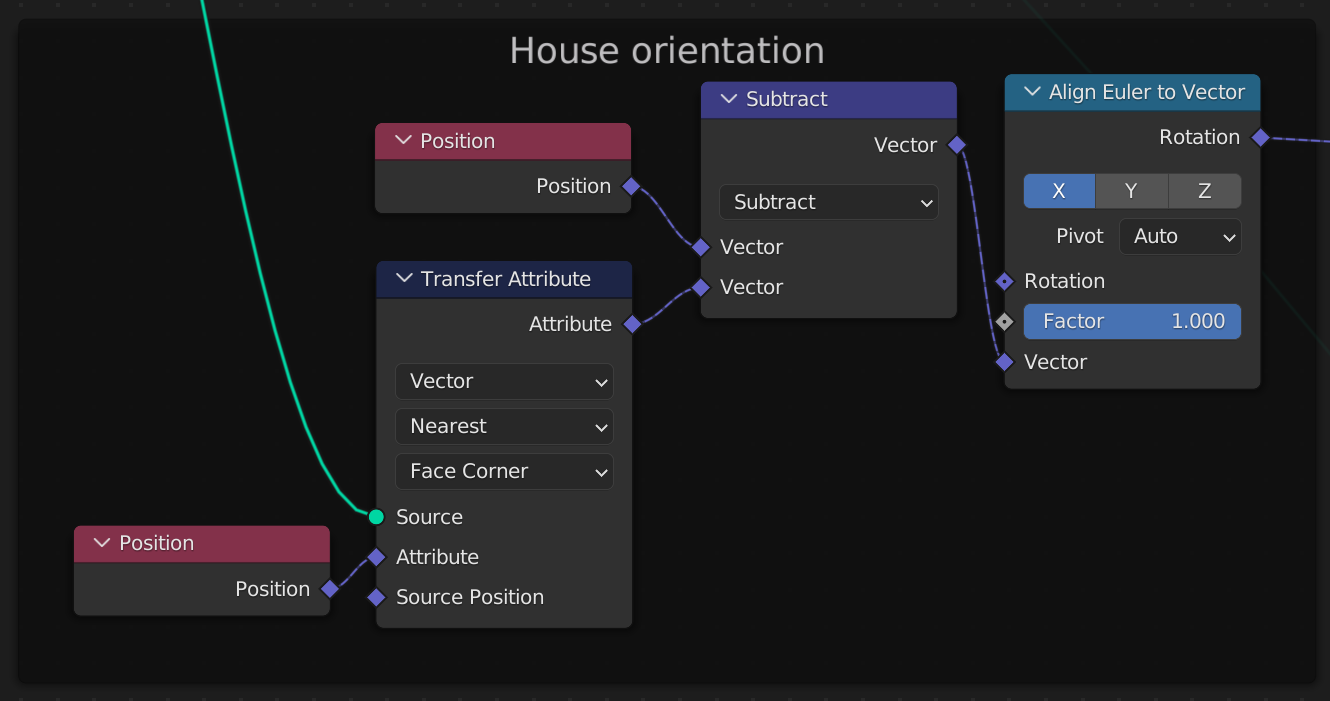
Orientation
Ideally the houses should face the avenues. The method I've opted for is to orient them using the vector P - C, where P is the position of the house, and C is the closest corner of the residential block.
People
Asset
I reused a character model I had made for a previous animation. It turns out it is possible to reuse a rigged character from the Asset Browser. I'll write a more detailed post about the process in the future.
Position
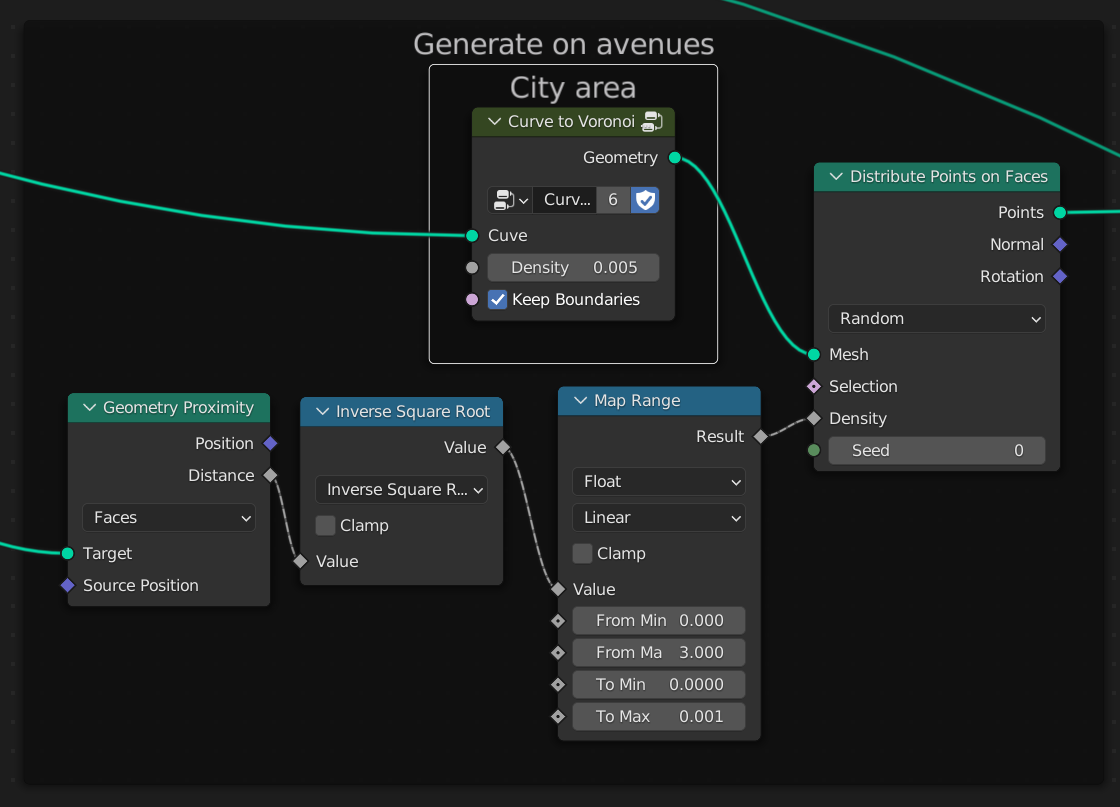
I placed the people on the avenues using the Distribute Points on Faces node. This time I used variable density. I broke up the city parameter with my Voronoization node. Each face in that mesh is assigned a density based on how close it is to the avenues. See the Geometry Proximity Node.
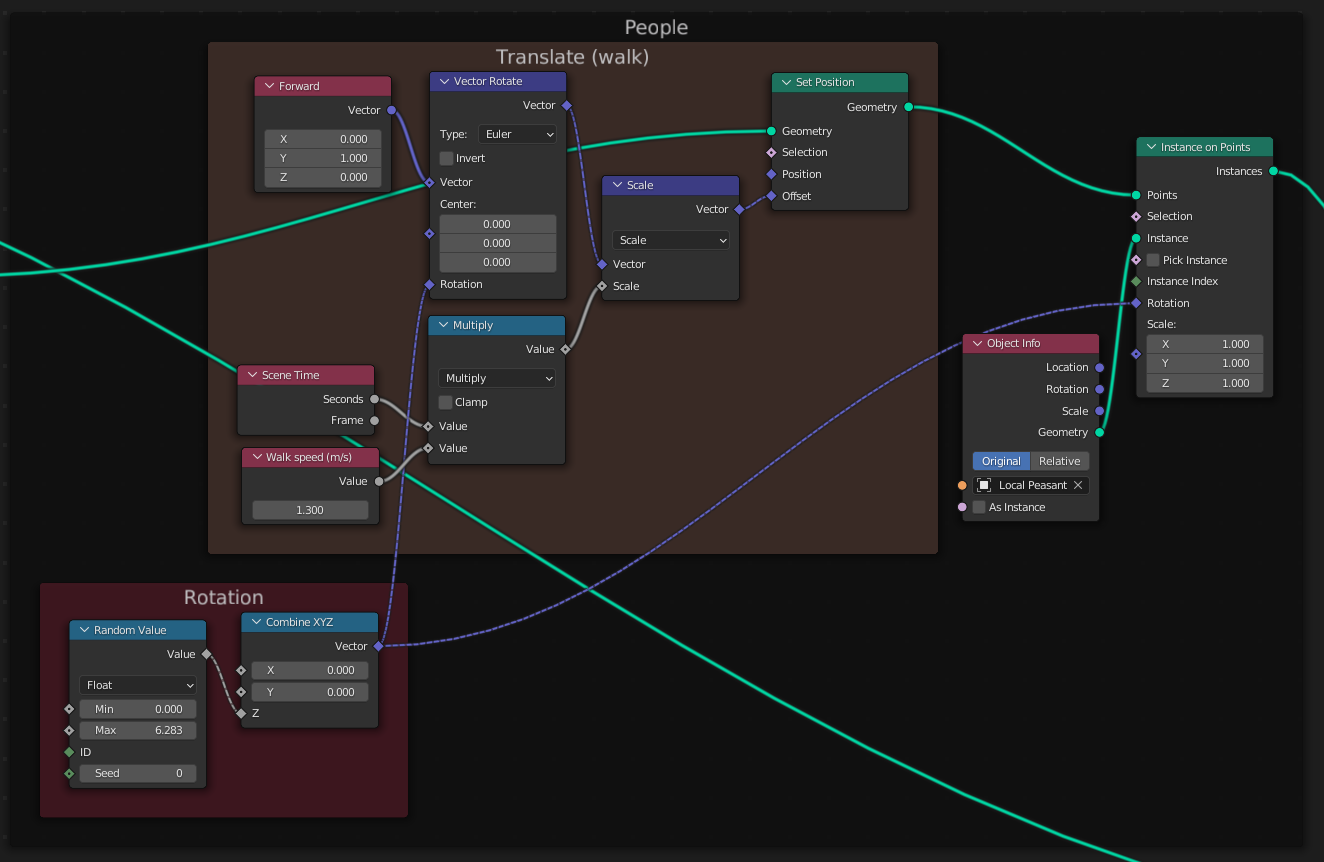
Walk
To make each person walk in their own direction, I modify the person's position based on the scene time, using a walk speed of 1.3 m/s. That's a normal walking speed according to Google.
Bushes
I tried making my own bush using a simple half sphere painted green. But it didn't look good. Later I learned that Blender actually has a built-in plugin that makes trees. So I used that instead.
I placed those bushes in the residential areas. I tried putting them on the avenues, but they do not look good there.
Finally, I gave each of them a random scale and rotation to make them less repetitive.
Sun
Initially, I had a Sun object, but no sky. It turns out, if I assign a Sky Texture to the World shader, it gives me much better lighting as well as a sky. Perfect.
Random colors
Random colors really help break the monotony of the scene.
Per object
The Object Info Node's Random field gives a random value from 0 to 1. Then I can add a Color Ramp to choose a range of random colors to assign to my object. This way, each house, each door, each window can have its own color.
Per brick
I also wanted each brick on the wall to have its own color. To do this, I duplicated the Voronoi Texture, and instead of Distance, I used Color, and another Color Ramp.