Voronoi pattern with Geometry Nodes in Blender 3.1
In my latest project, I wanted to build a city and layout avenues and streets. I thought a Voronoi pattern would make for realistic layouts. Even though there's no Voronoi pattern node in Blender, there's a way to make something similar.
Inspiration
I found the method in this YouTube video. He explains it quite fast, uses some of his premade nodes, which refer to other videos, and also shows others unrelated tricks. This post is meant to distill the essence of the method, improve on it and make it reusable.
General approach
The method boils down to:
- creating a curve that serves as the outline.
- adding randomly placed points inside the curve and on the outline itself.
- converting it into a triangle mesh with the Fill Curve node.
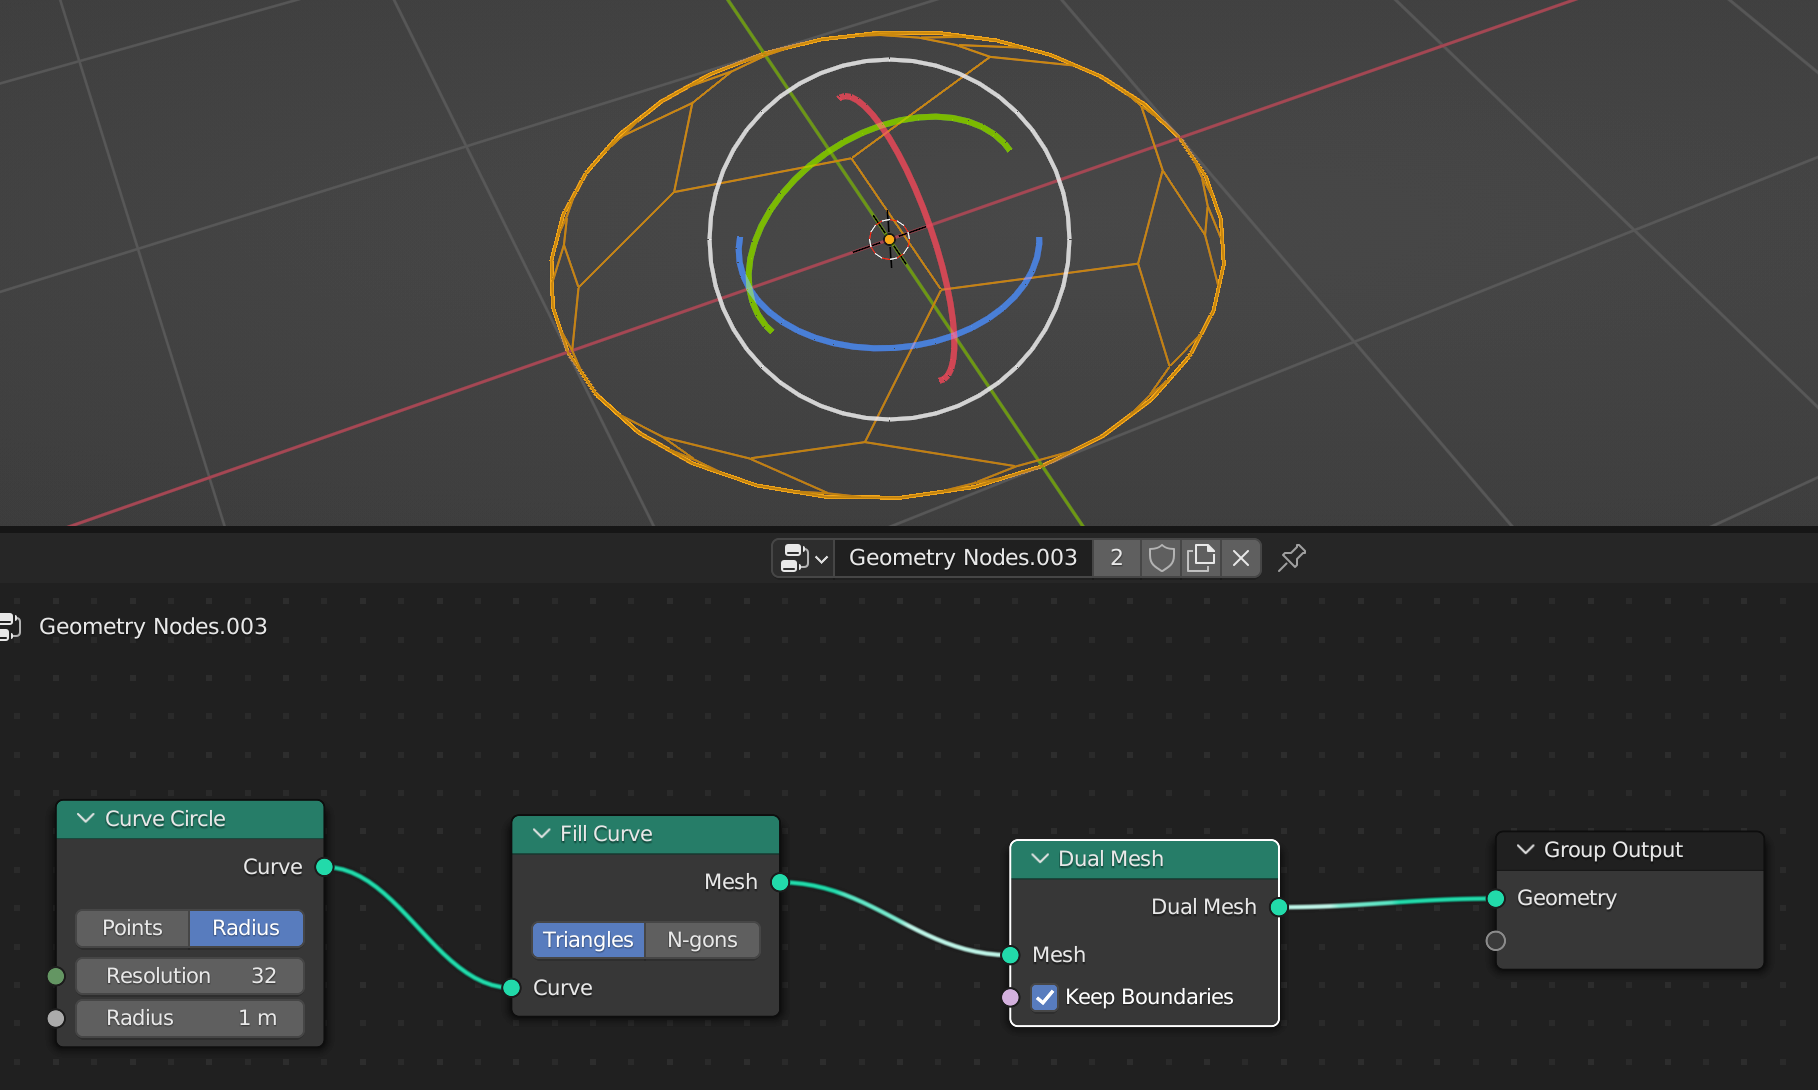
- computing the dual mesh with the Dual Mesh node. A dual mesh transforms faces to vertices, and edges to faces.
Fill curve + Dual mesh
Check out what the nodes do to a circle outline.
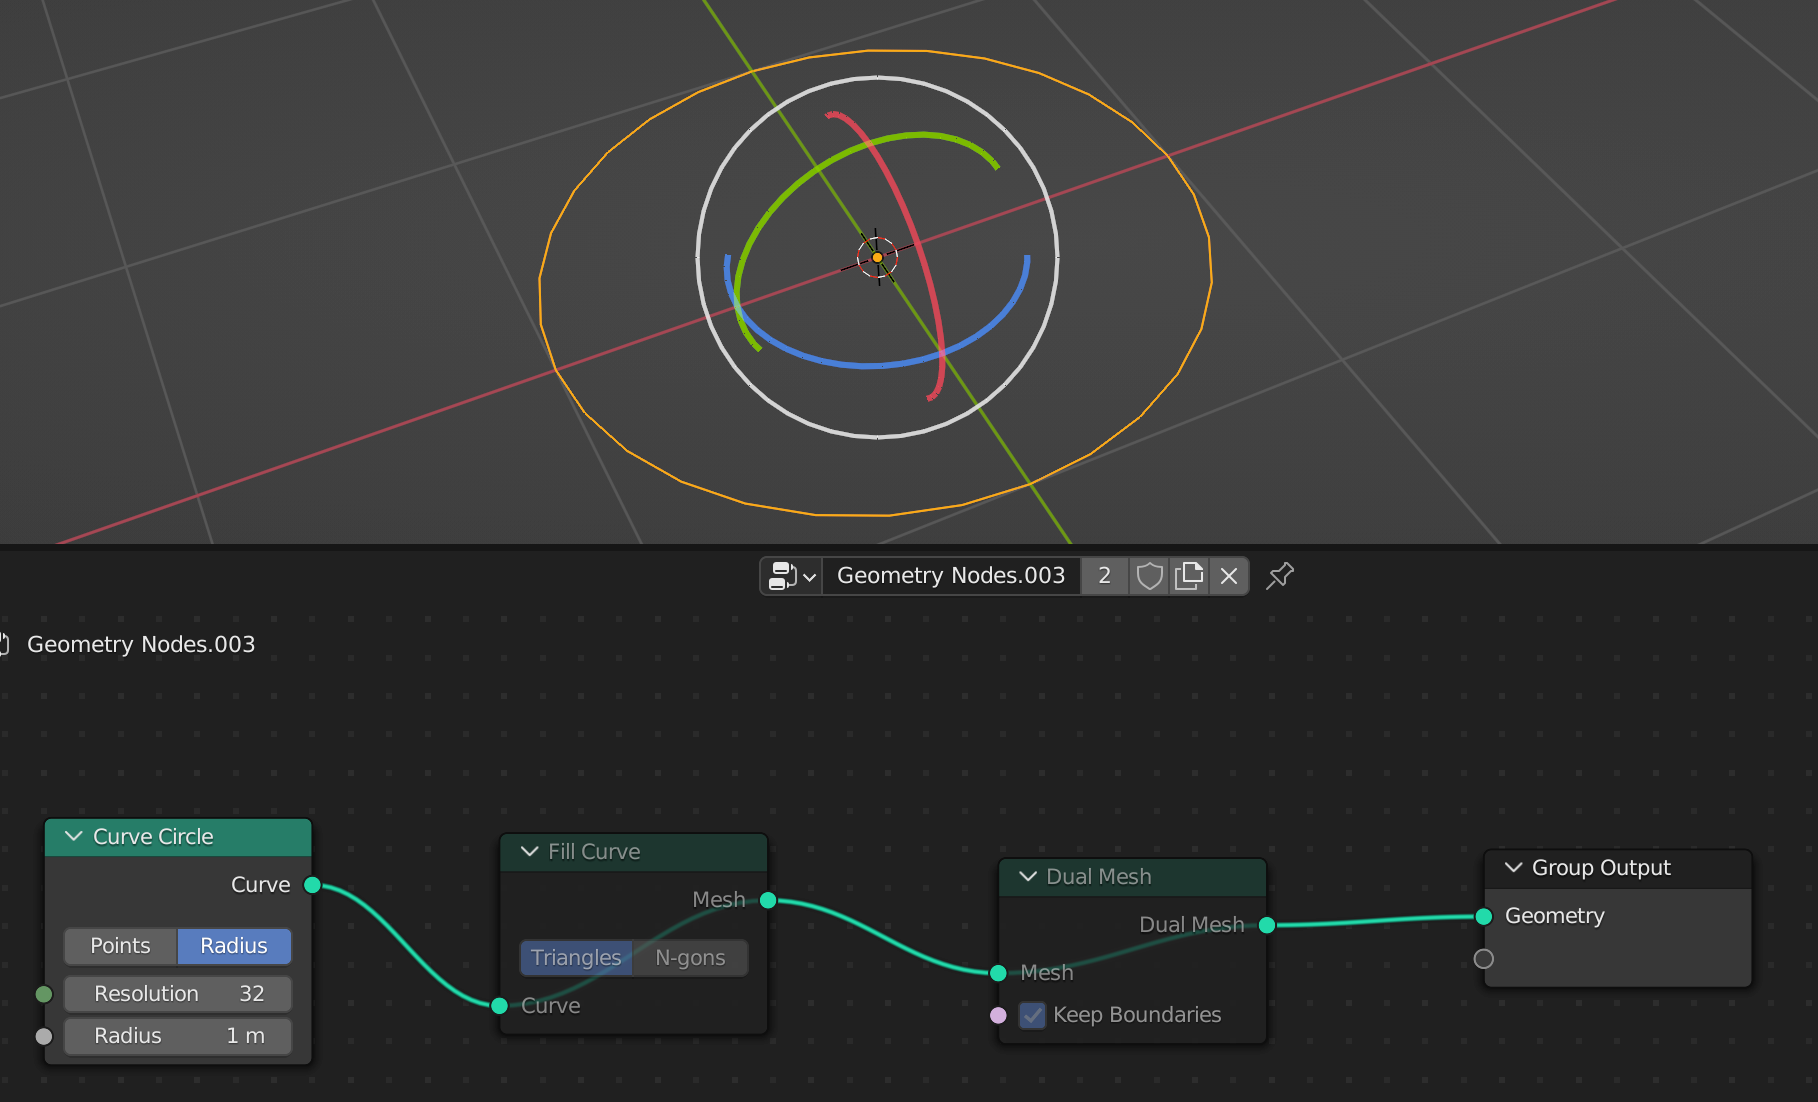
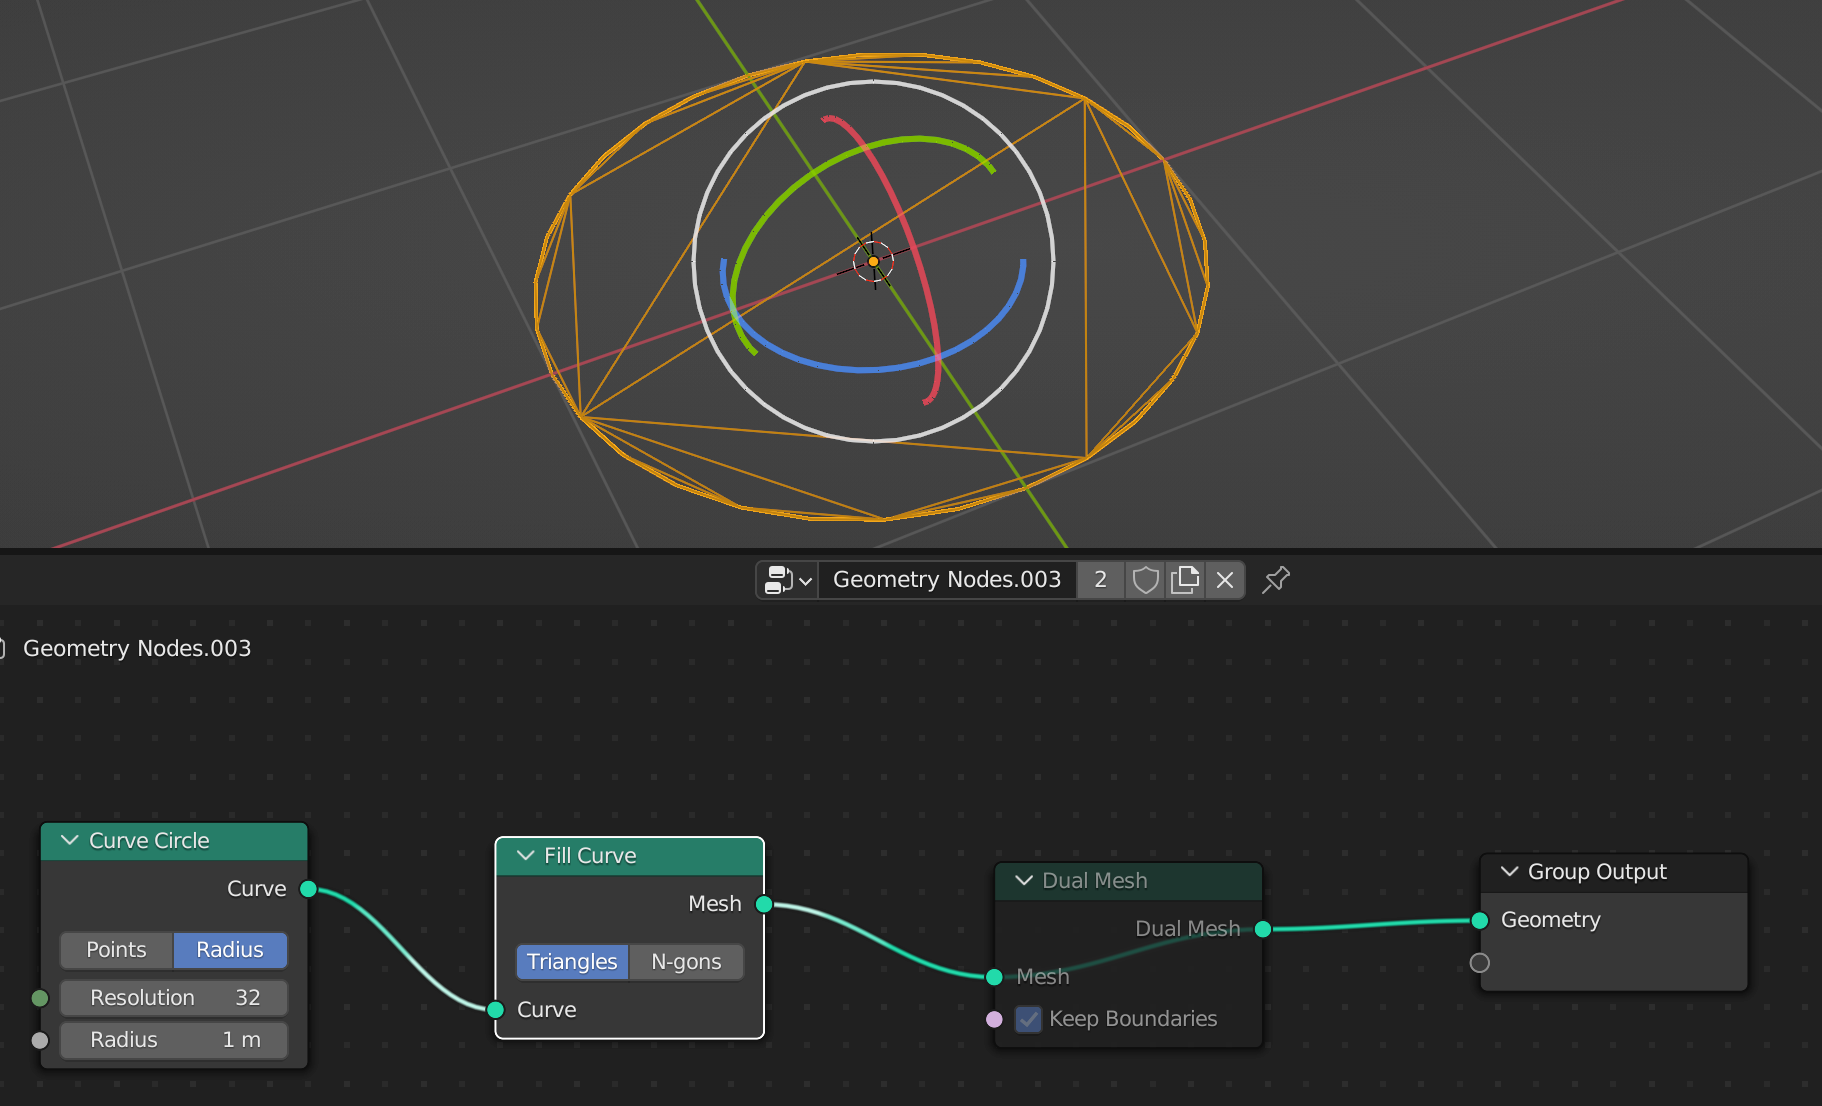
This already looks pretty good, but that's only because we started with a circle. It's a sufficiently complex curve that the result looks random. Had we used a rectangle, we'd have gotten nothing of the sort. Hence the need for random points to break up the geometry some more.

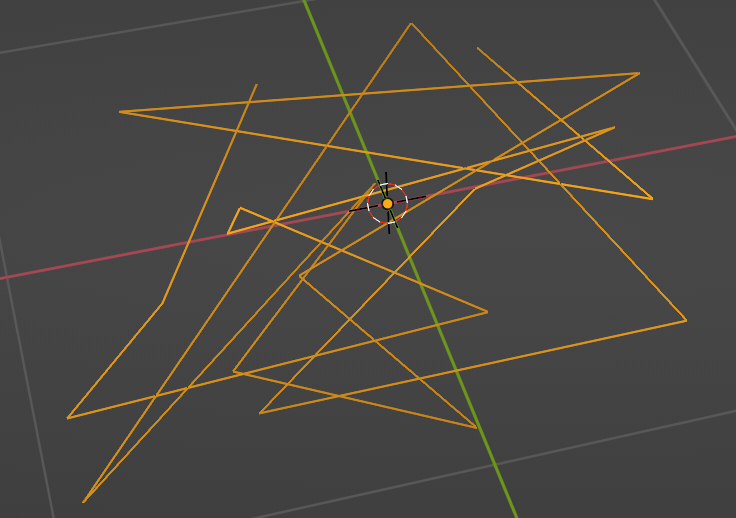
Random points
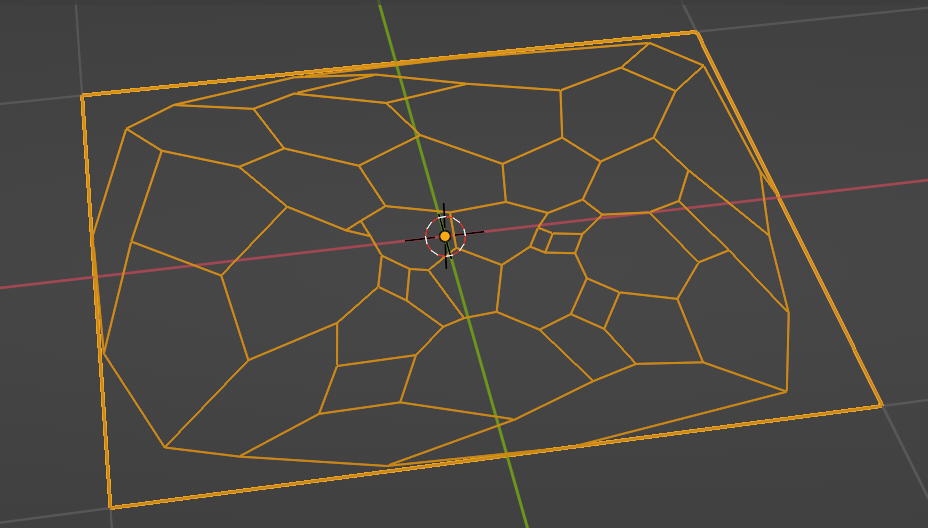
Let's take a look at the effect of random points.

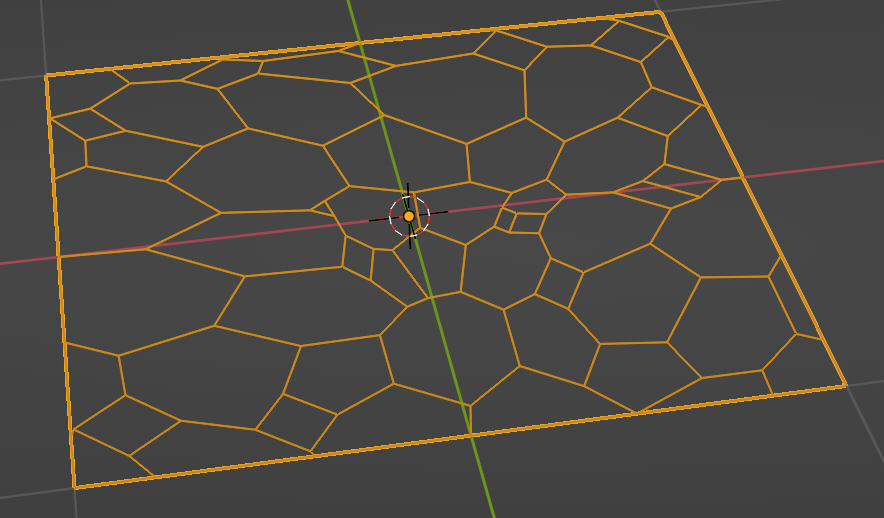
Fixing the outer shapes
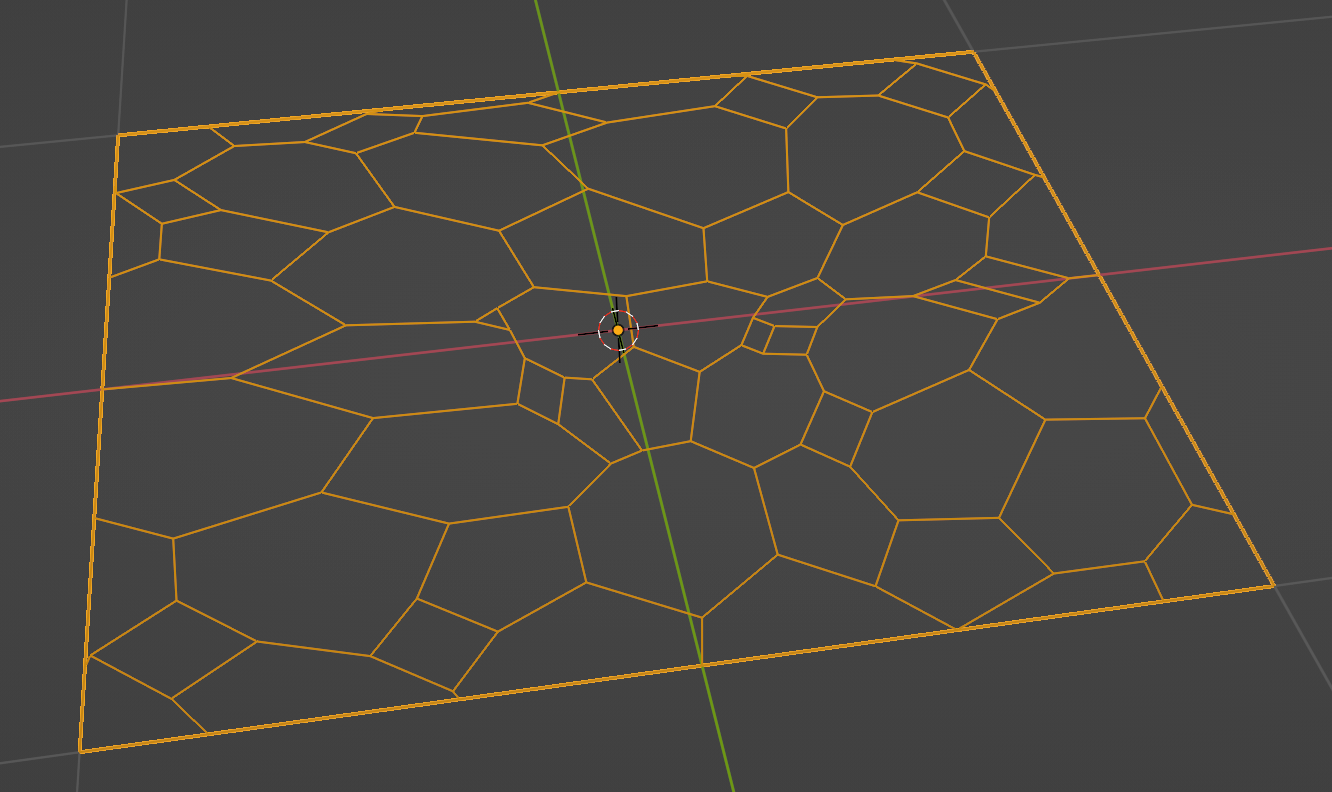
As you can see in the previous screenshot, the shapes on the boundaries look very thin with sharp angles. One way to prevent this is to also put points not just inside the curve, but on the curve boundaries themselves, to break them up. Here's the result with this fix.
Nitty-gritty details
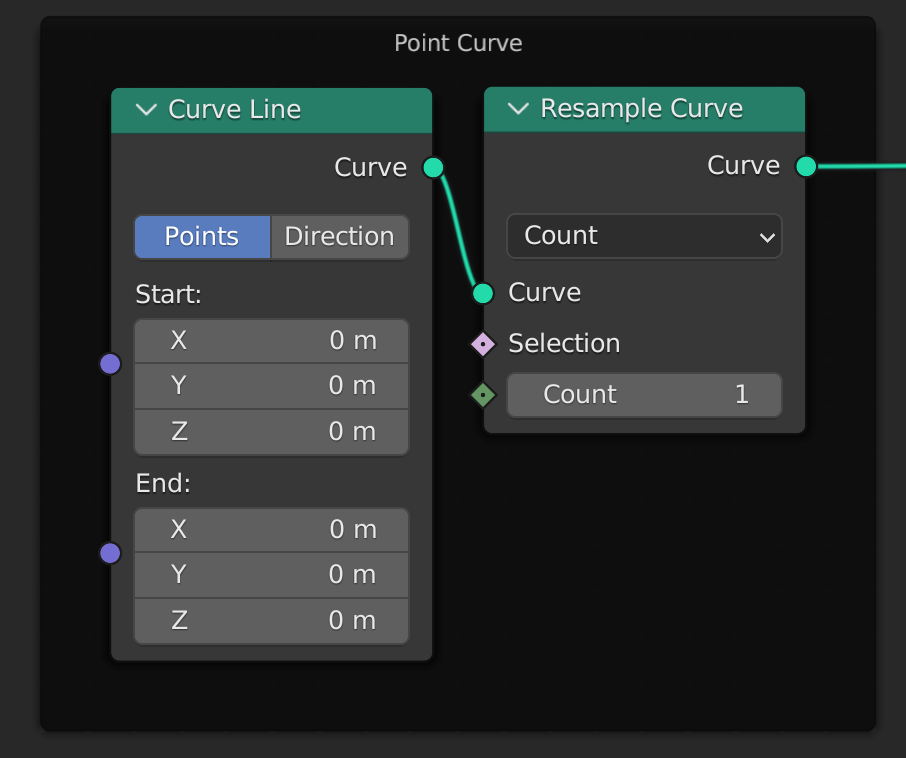
Points vs Point Curves
One restriction of the Fill Curve node is that the objects being joined have to be curves. Since I want to add points to a curve, I need to convert the points to curves. As of Blender 3.1, there is no curve point primitive node. So this is how to make one ourselves. We make a curve line, which is made out of 2 points. Then we resample to keep only one point.
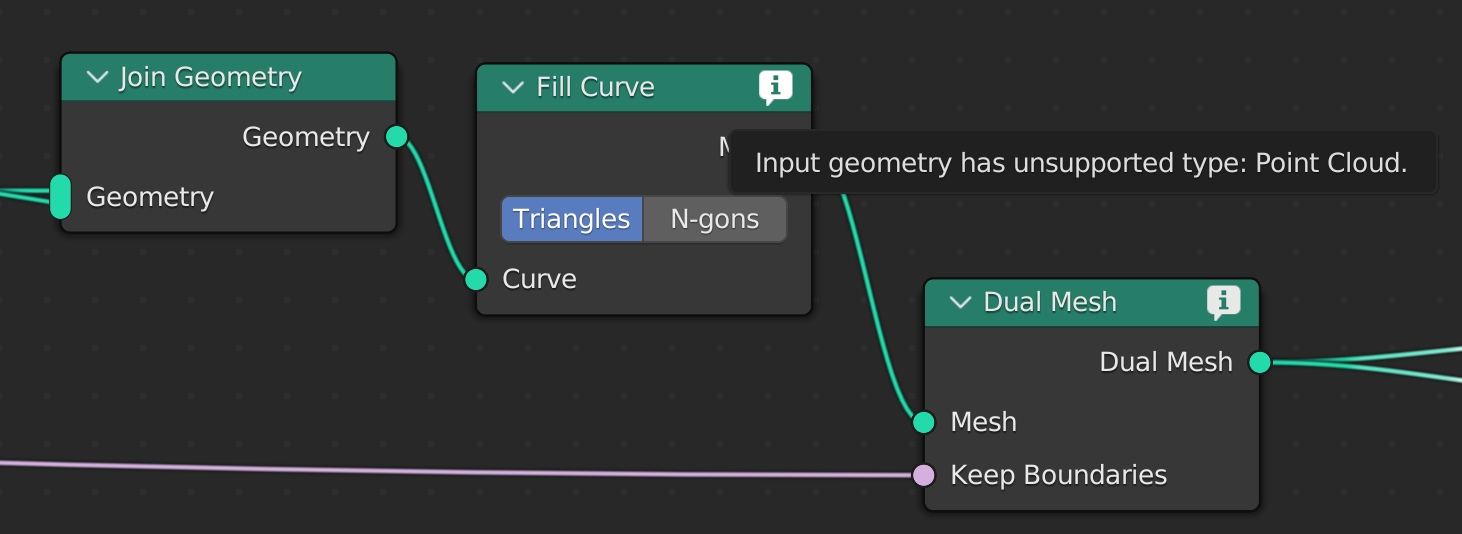
Here's the error that the Fill and Dual Mesh node will spit out if you don't use point curves:
Input geometry has unsupported type: Point Cloud.
Instancing points
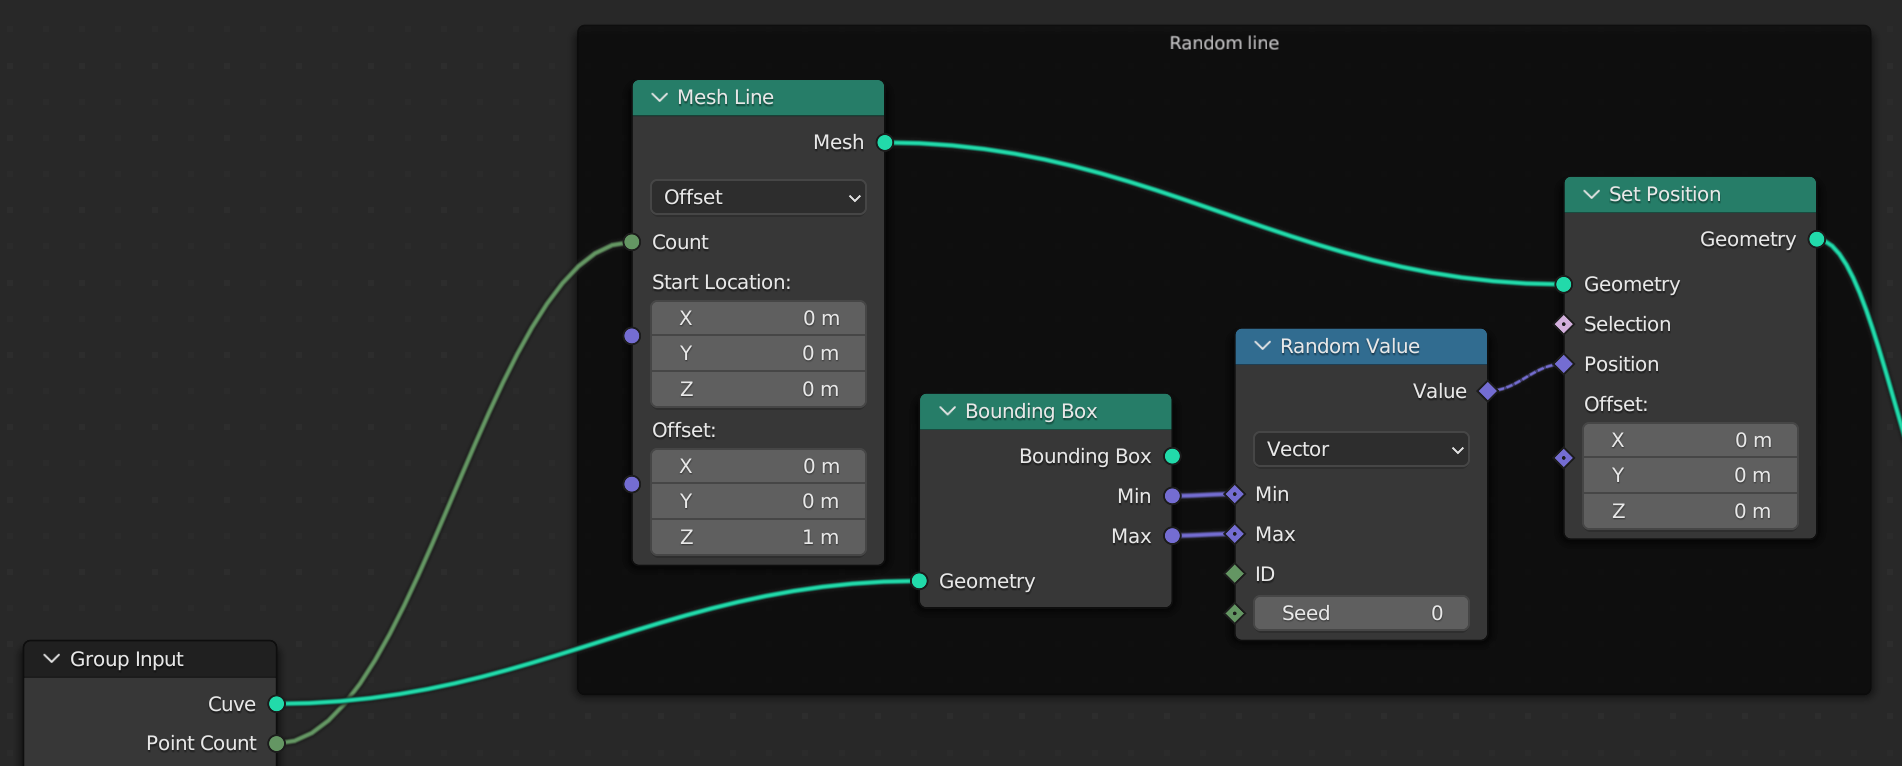
There are many ways to instantiate points in a given area. The usual way is to use the Distribute Points on Faces node. Instead, in the video, the YouTuber used a Mesh Line with a given number of points, and for each point, they used the Random Value node to generate a position. Let's take a look at their approach first.
Generating random positions, the hard way
In order to generate random positions mostly inside the curve, I introduced the Bounding Box node. There might be cases where the point is within the bounding box, but still outside the curve boundaries. That's ok because the Fill Curve node down the line will ignore points outside. For each point generated by the Mesh Line, I set its position to a random value within the bounds of the curve. Overall, this is a convoluted way to make a point cloud inside the curve.
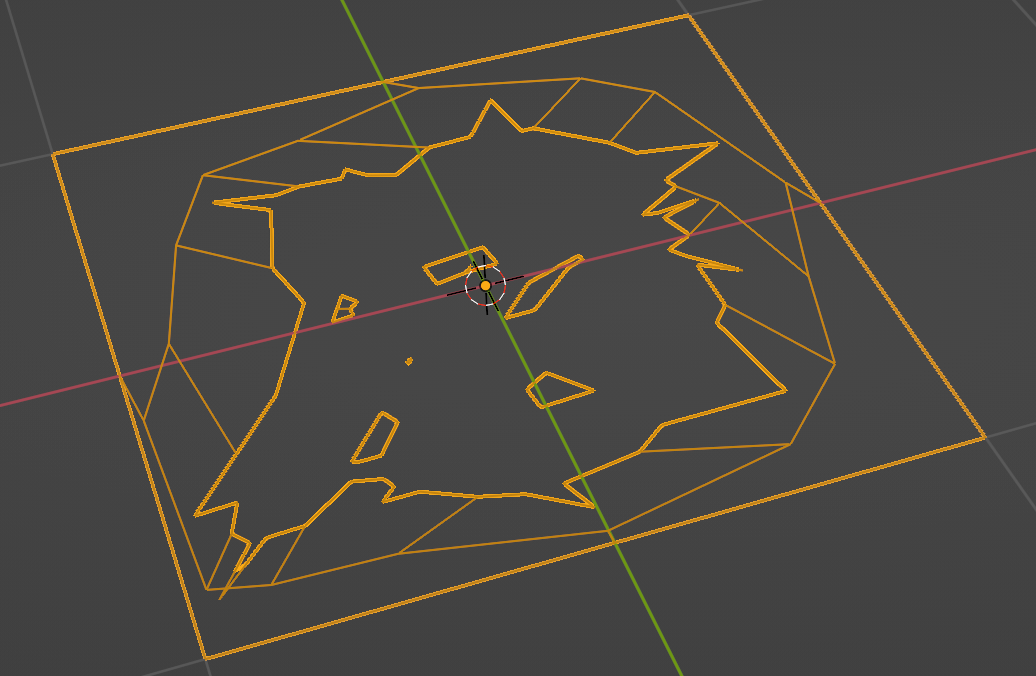
Here's the output on a square curve:
We could join this with the curve, then try to fill with triangles and compute dual mesh, but the results are not great. They're much better using points.
Generating random positions, the simpler way
Distribute Points on Faces has many advantages:
- it ensures all the points are inside the curve.
- it comes with a Density parameter. We can add the same parameter to our geometry node's inputs and simply pass through the value.
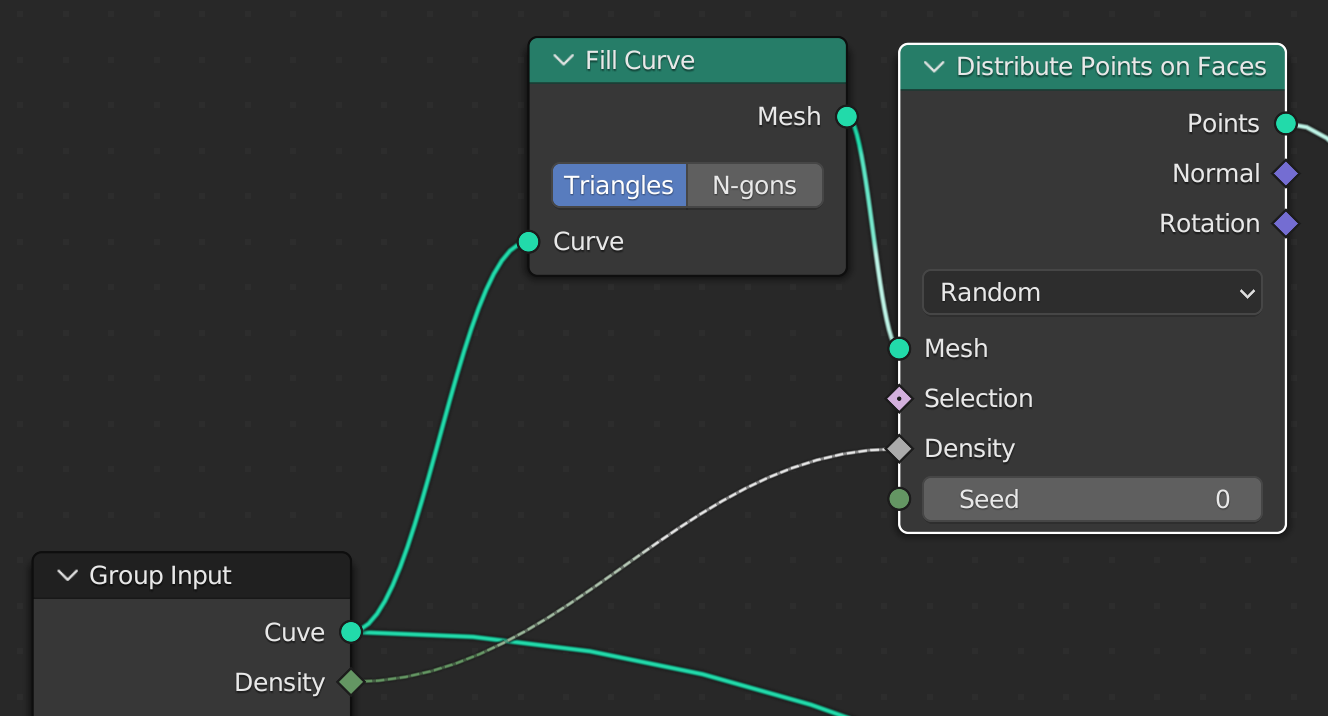
Since our input is a Curve, but Distribute Points on Faces works on mesh faces, we flesh out faces with the Fill Curve node first.
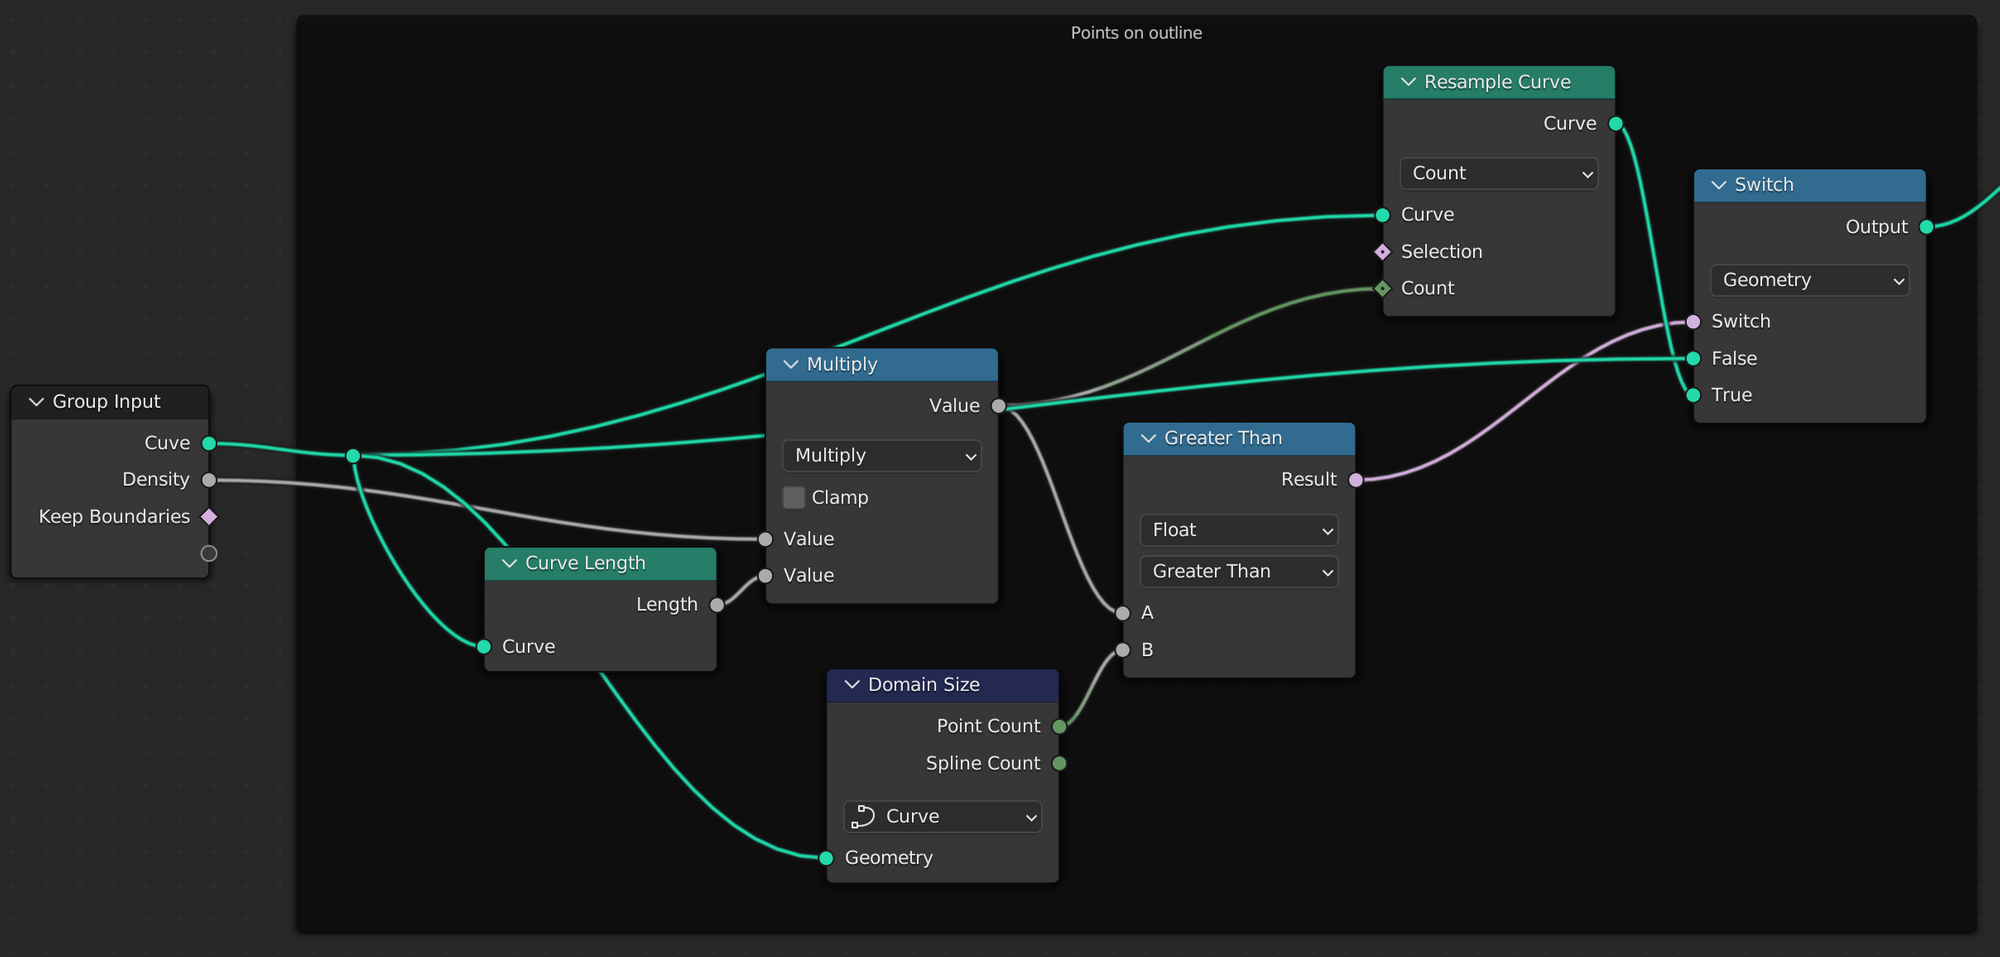
Refining the outer shapes
To distribute points on the outline, we use the Resample Curve node. In order to reuse the same density parameter as in Distribute Points on Faces, we should convert this into a value Resample Curve can readily use. In the documentation of Distribute Points on Faces, the definition of density is:
The point density for the point distribution. The unit is in number of points per square meter.
So for a given surface S, there are Sd points in it. Similarly for a curve of length L, there should be Ld points in it. Resample Curve takes either the number of points or the length between points. So we can simply compute Ld and feed it. There's even a node for that: Curve Length.
There is one edge case, which is when Ld is too small to even maintain the initial shape. For example, if you start with a square, but the density is so low that Ld gives only 1 or 2 points, Resample Curve will give you an unusable resampled outline curve, and nothing will show up. To prevent this, we use a Switch node and compare Ld with the outline curve point count. If Ld is too low, we don't resample at all and use the original curve.
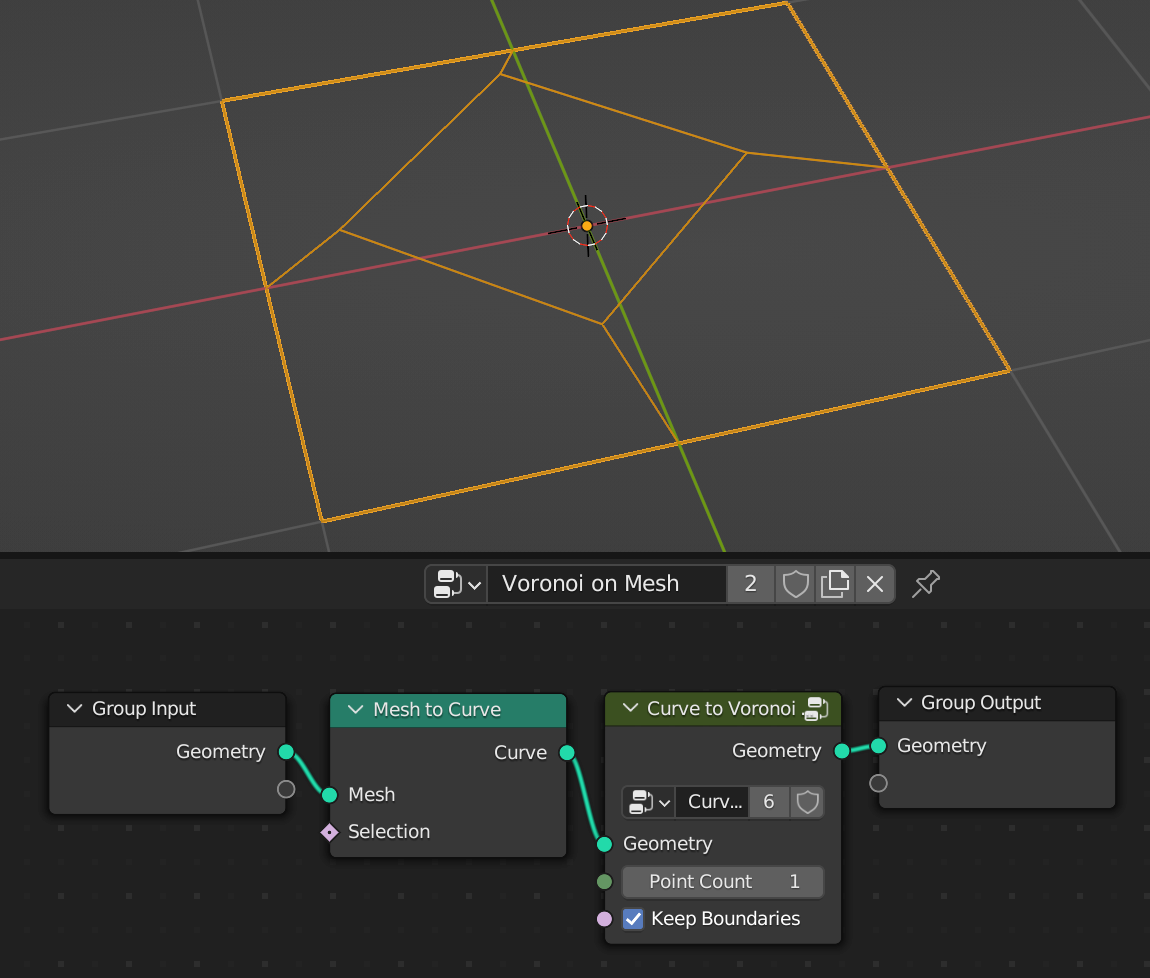
Keeping the boundary of not
Instead of keeping the boundary, one may simply want to do without it. To support that case, I added a Keep Boundary parameter to the geometry node. I feed this value directly to the Dual Mesh node, and I also use this value to decide whether to refine the outline or not. If we are not even going to keep the boundary, refining it is unnecessary.
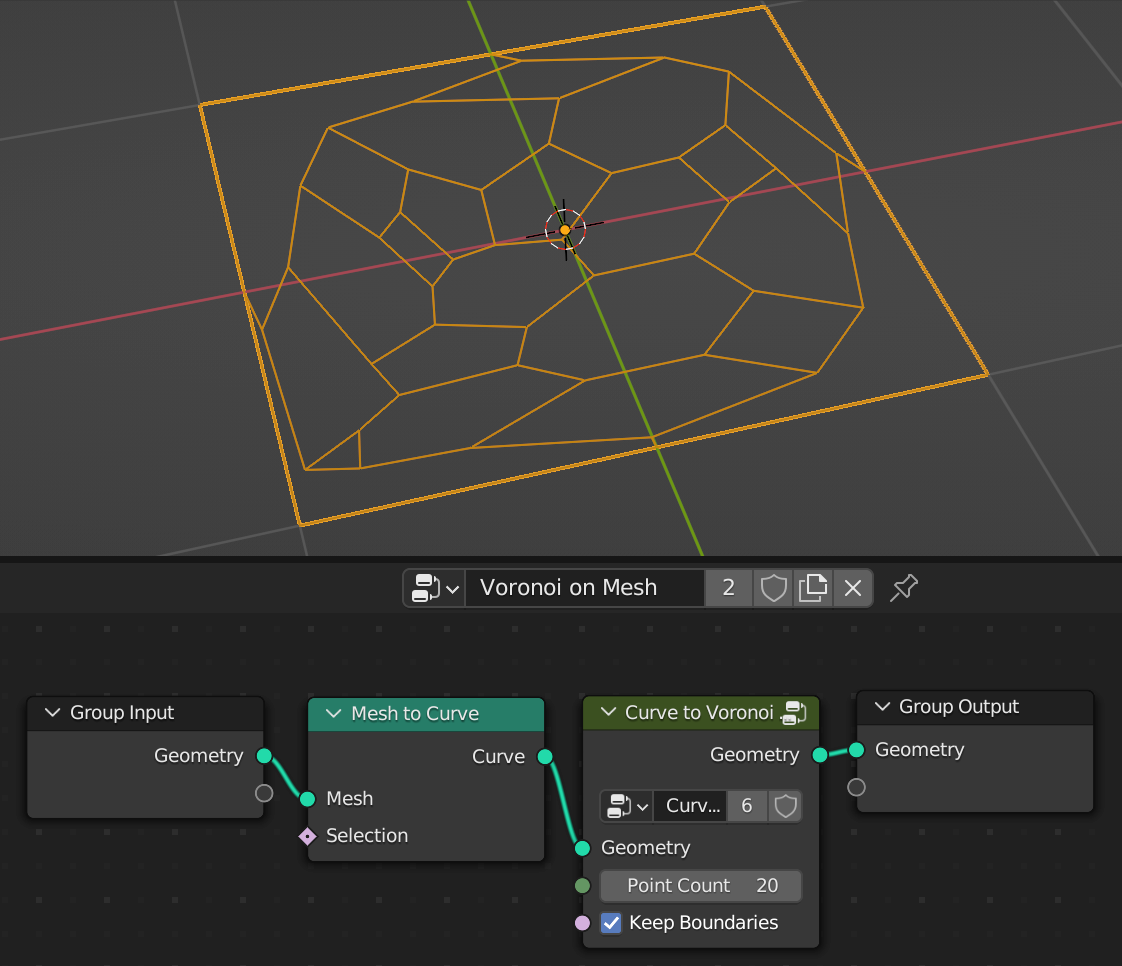
Final view
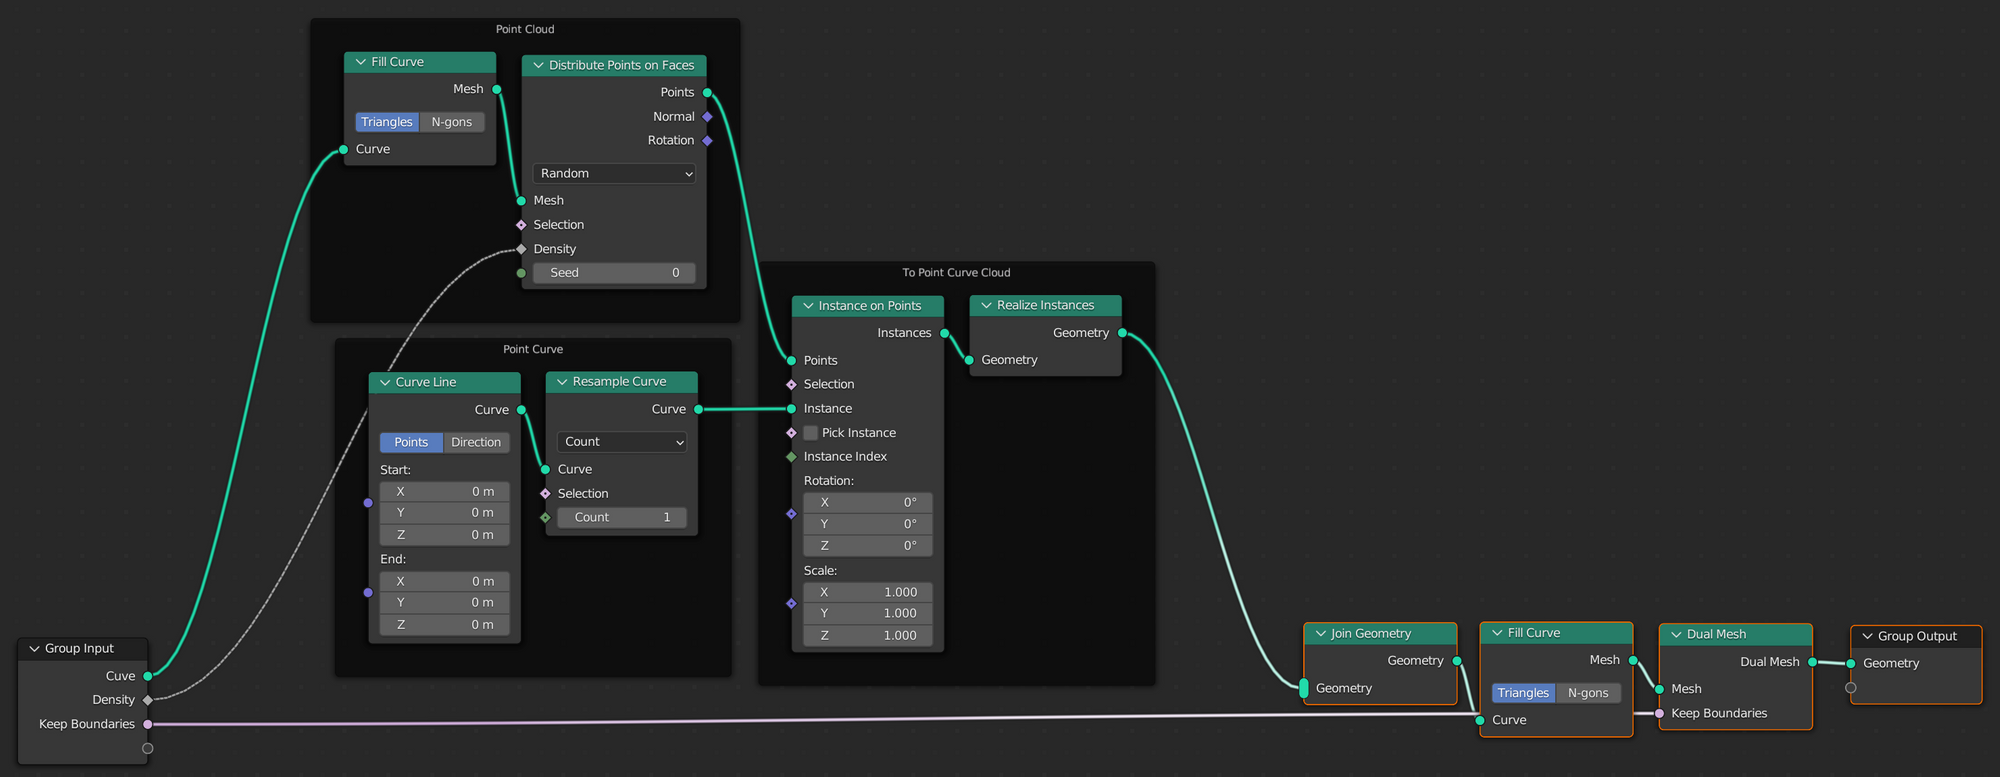
So here's the full Geometry Node.
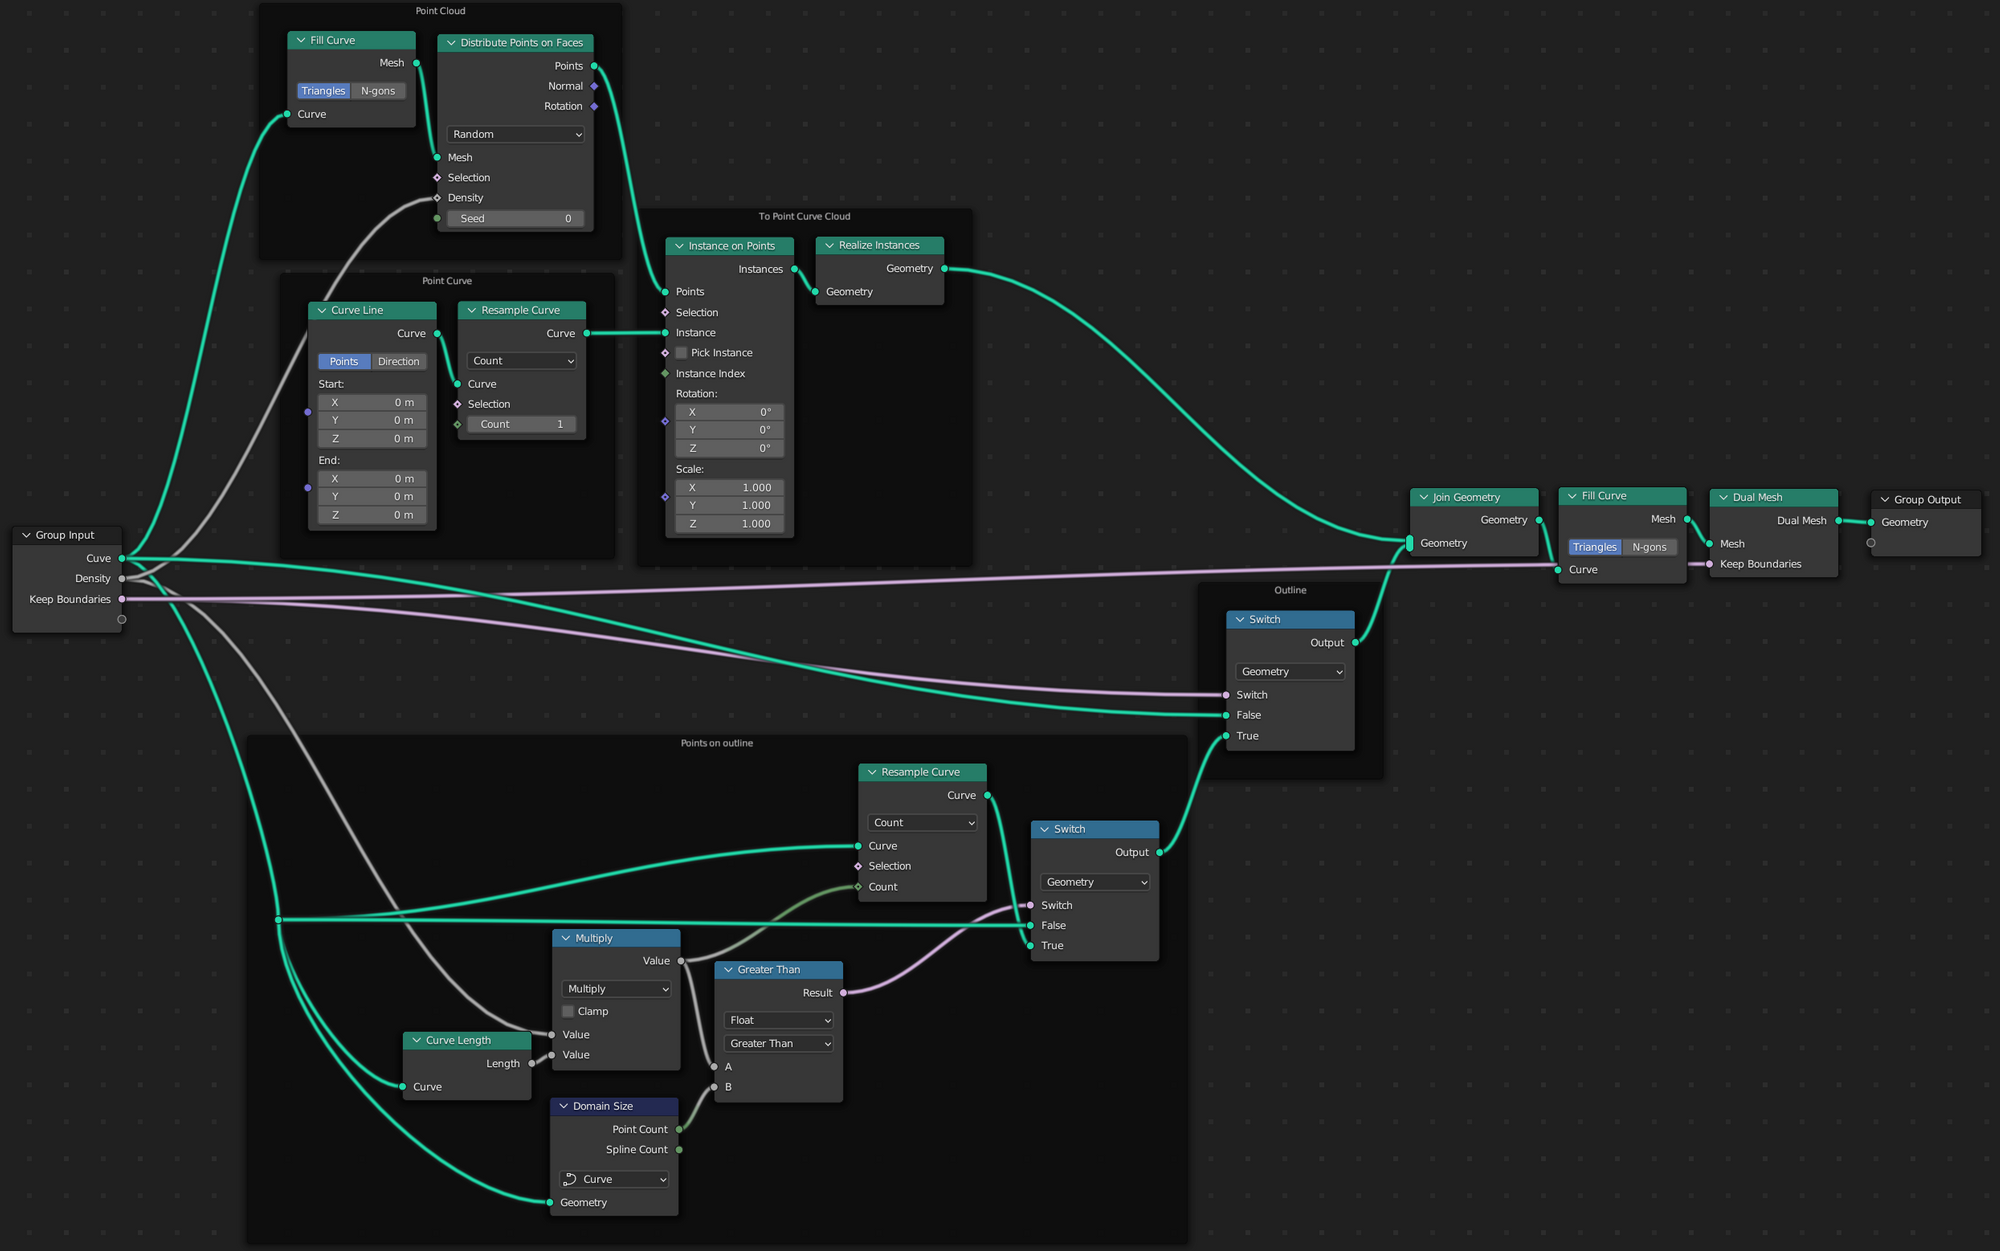
It takes as input:
- a Curve outline
- a float Density
- a boolean Keep Boundaries
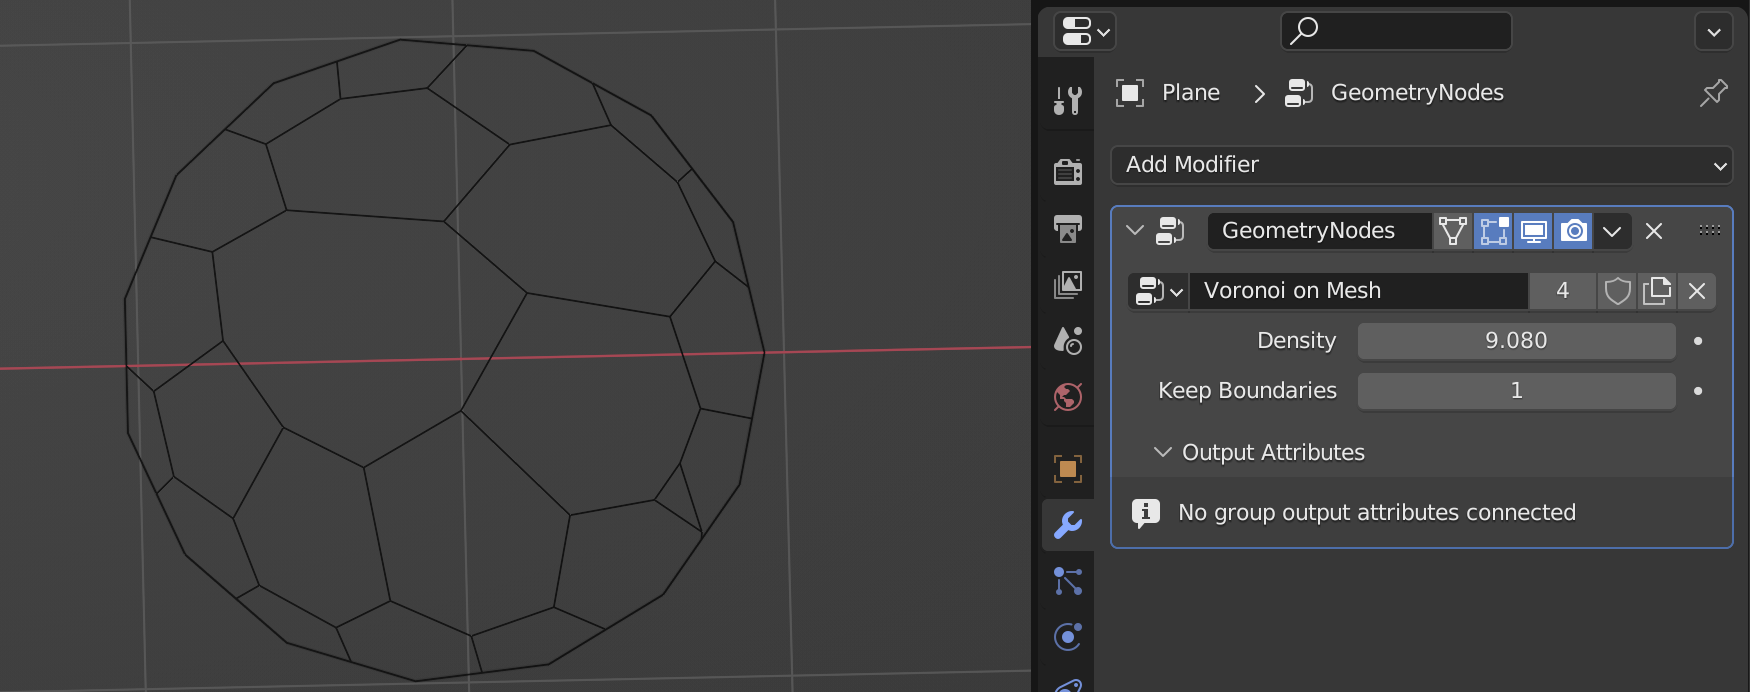
See the result when applied to a Bezier Curve circle. I can drag the Density parameter up or down as I wish.
By the way, most of the complexity comes from refining the outer shapes. If you don't care about that, you can use this simplified version: